
Continuous Integration and Continuous Deployment(CI/CD) using AWS CodePipeline and AWS CodeStar
Learn how to create development and production pipelines for your web service projects using AWS CodePipeline and AWS CodeStar. Having a development and a production pipeline can streamline development and production workflow.
AWS CodeStar
CodeStar is a service that unifies and streamlines the following AWS services to provide smooth CI/CD experience.
- AWS CodeCommit
- AWS CodeBuild
- AWS CloudFormation
- Amazon CloudWatch
- AWS Cloud9
Quoted from AWS CodeStar page:
AWS CodeStar provides a unified user interface, enabling you to easily manage your software development activities in one place. With AWS CodeStar, you can set up your entire continuous delivery toolchain in minutes, allowing you to start releasing code faster.
AWS CodePipeline
CodePipeline is a managed continuous integration and development service.
Quoted from AWS CodePipeline page:
AWS CodePipeline is a fully managed continuous delivery service that helps you automate your release pipelines for fast and reliable application and infrastructure updates.
CI/CD Configuration Steps
If there is any build error when following the steps, it is probably caused by IAM permission issue. Check status reasons and error messages on CodeBuild and CloudFormation console. You may need to add permission for your project CloudFormation role.
1. Create a CodeStar Project
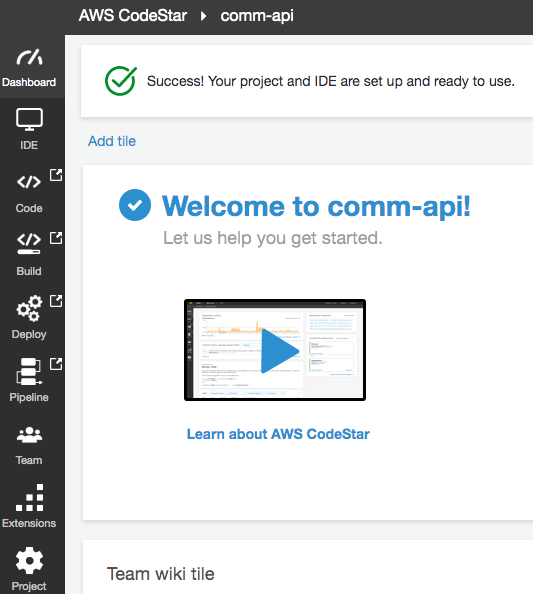
Create a CodeStar web service project. You can choose Cloud9 as your IDE and CodeCommit as your code repository. It may take a few minutes for AWS to create and configure resources for your CodeStar project.
When CodeStar project is ready, you can open up the default project code using Cloud9 IDE or git clone and open it using your local IDE.
2. Add Production Branch
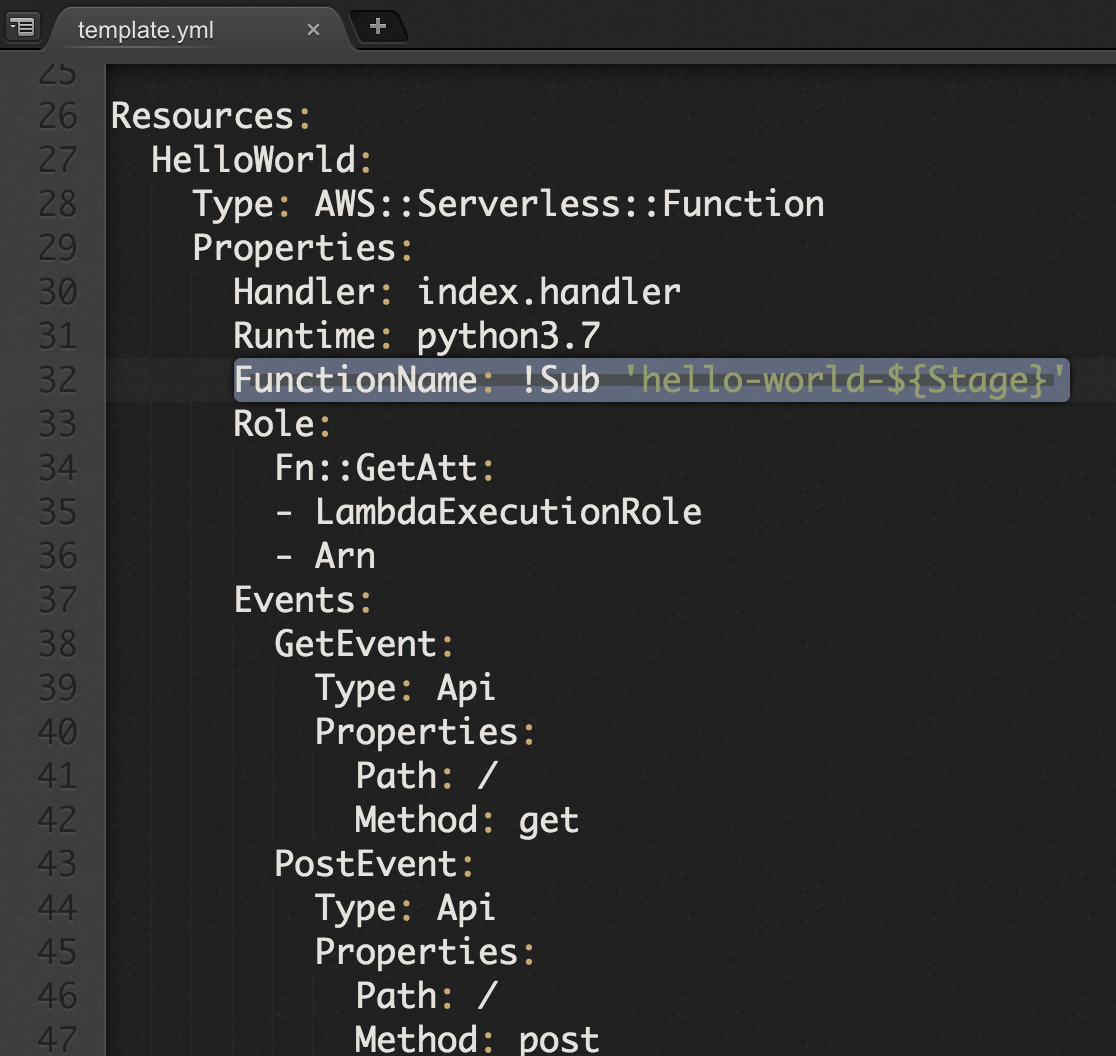
Add FunctionName: !Sub 'hello-world-${Stage}' property to the default HelloWorld function. This function name value is based on Stage parameter value.
!Sub is a CloudFormation template intrinsic function that replaces a variable with the specified value when a project is built.
Resources:
  HelloWorld:
    Type: AWS::Serverless::Function
    Properties:
      Handler: index.handler
      Runtime: python3.7
      FunctionName: !Sub 'hello-world-${Stage}'
      ...
Template.yml on Cloud9 IDE.
After that, run the following Git commands to push function name change and create a new Git branch for production. If you are on Cloud9 IDE, you can click + button and select New Terminal to open a terminal tab to run the following commands.
git add template.yml
git commit -m 'update function name'
git push
git checkout -b prod
git push -u origin prod
3. Edit Dev Pipeline
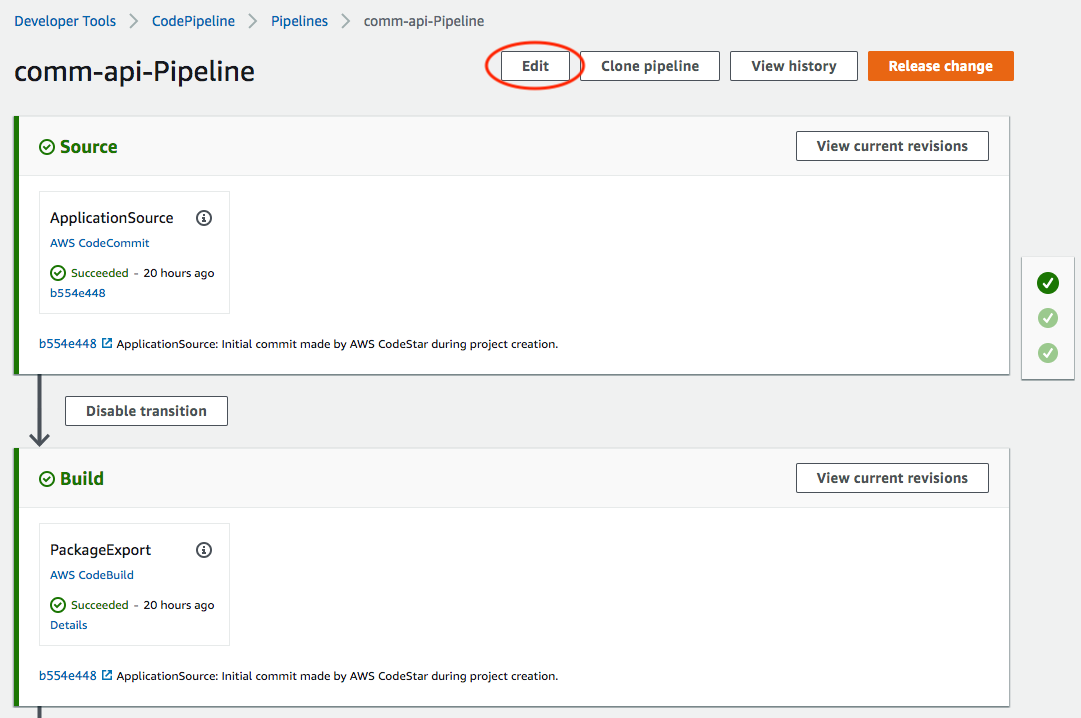
Open CodeStar project console. On the left panel of a CodeStar project console, you can see a Pipeline button. Clicking on it will open up the default pipeline created for your project. At this step, you will modify the default pipeline to make it a development pipeline.
Click on Edit button edit pipeline.
Click Edit stage on GenerateChangeSet and edit button to edit pipeline ‘GenerateChangeSet’ action.
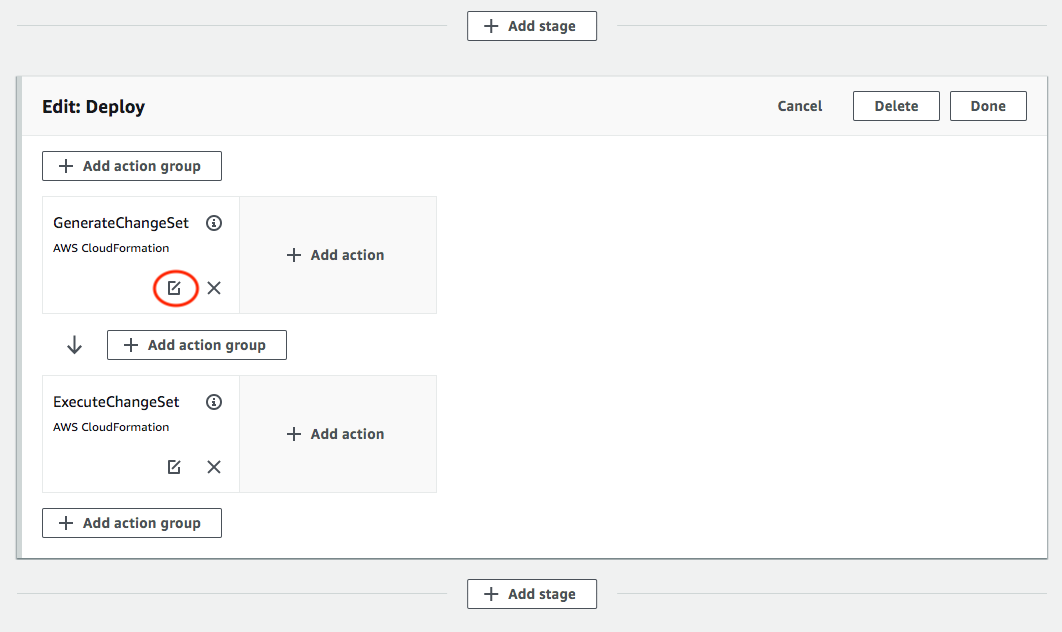
Scroll to advanced section, click the arrow icon to the left of Advanced subtitle and an input field for parameter overrides will show up. Add "Stage": "Dev" to parameter JSON object.
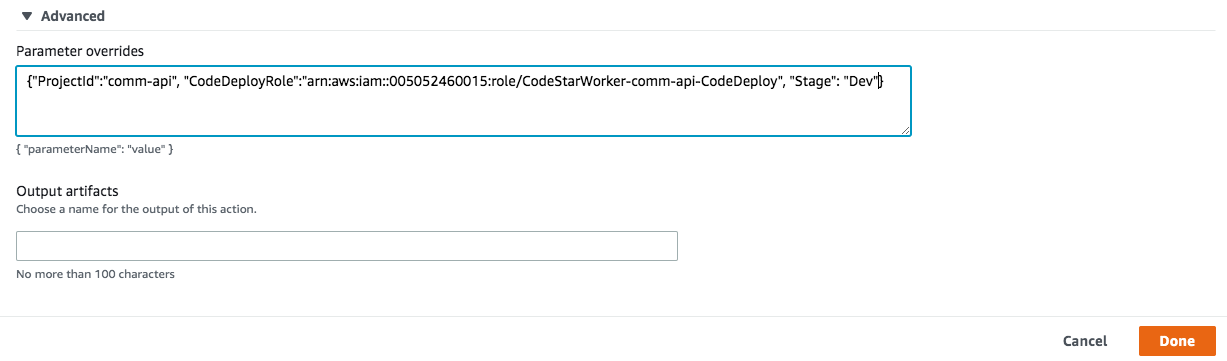
After that, click Done to close action menu and Save button on top to save changes.
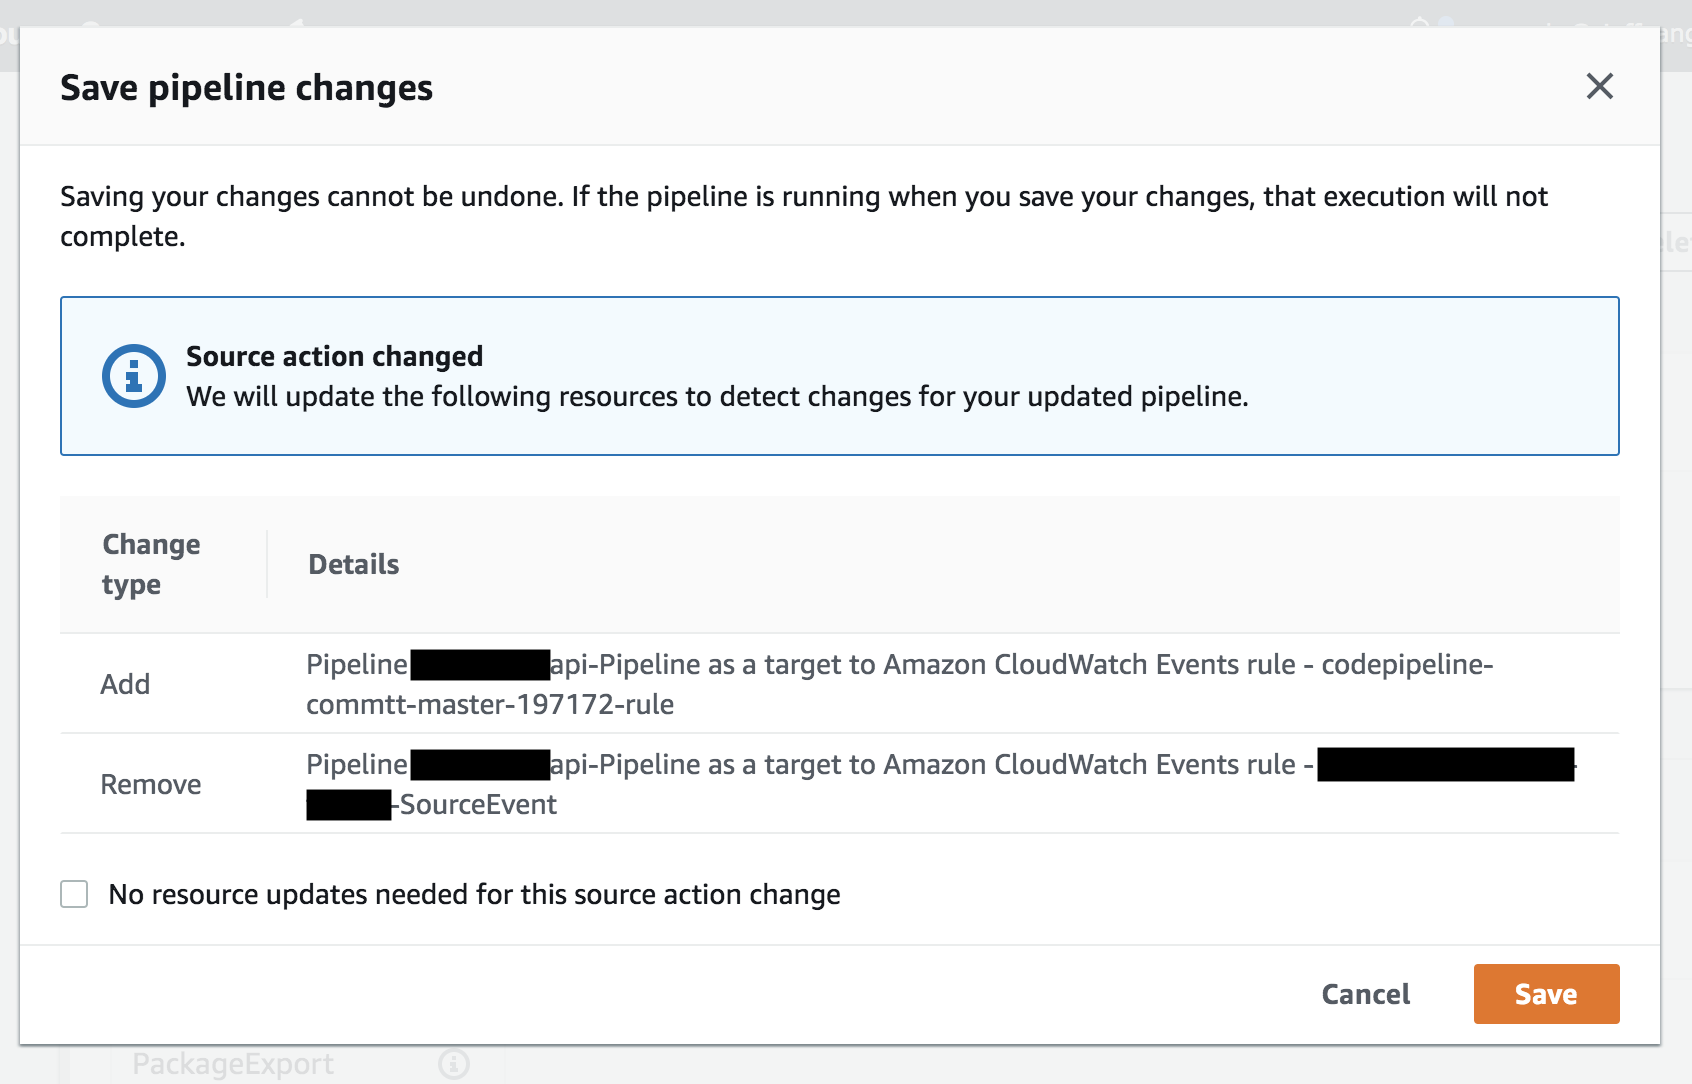
You would see the following warning popup saying that changes saved cannot be undone when you save pipeline changes for the first time.
4. Clone Pipeline
Now, development pipeline is ready. You can clone this pipeline to create a production pipeline.
Click Clone pipeline button to open up clone pipeline menu.
Do the following to create a production pipeline.
-
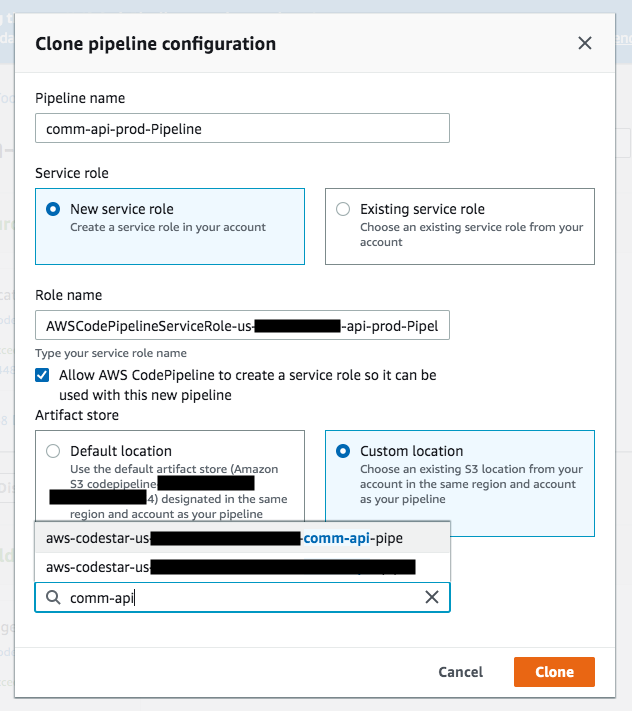
Change pipeline name to something that makes sense. I usually add the word
prodto inform colleagues that this is the prod pipeline. -
Choose
new service roleto create a new service role for your production pipeline. -
Choose
custom locationfor Artifact store and search for your project name inBucketfield. Based on typeahead suggestion, select the same S3 bucket location as the default pipeline. -
Click
cloneto start cloning pipeline.
5. Configure Prod Pipeline
After production pipeline is created, configure it to make it build from prod branch.
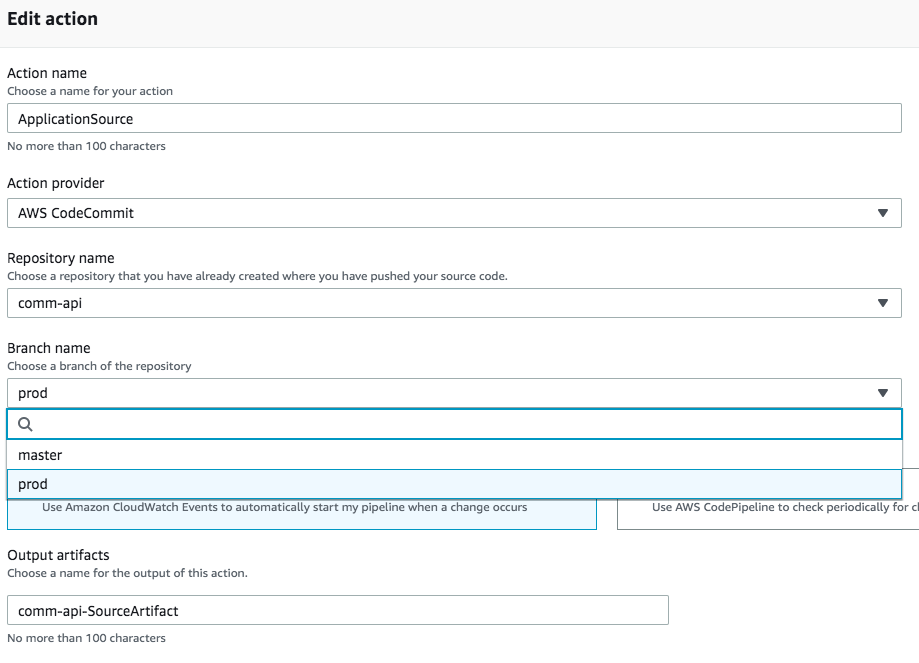
Click Edit on top to switch to pipeline edit mode. Then, click Edit stage in ‘Edit:Source’ stage. Next, click edit button (inside red circle in the picture below) to modify ApplicationSource action.

On the ‘Edit action’ menu, look for ‘Branch name’ and change source branch to prod (it was created in step 2) to make pipeline build from prod branch. Click Done to complete the change.
Then, edit Deploy stage to modify GenerateChangeSet and ExecuteChangeSet actions.
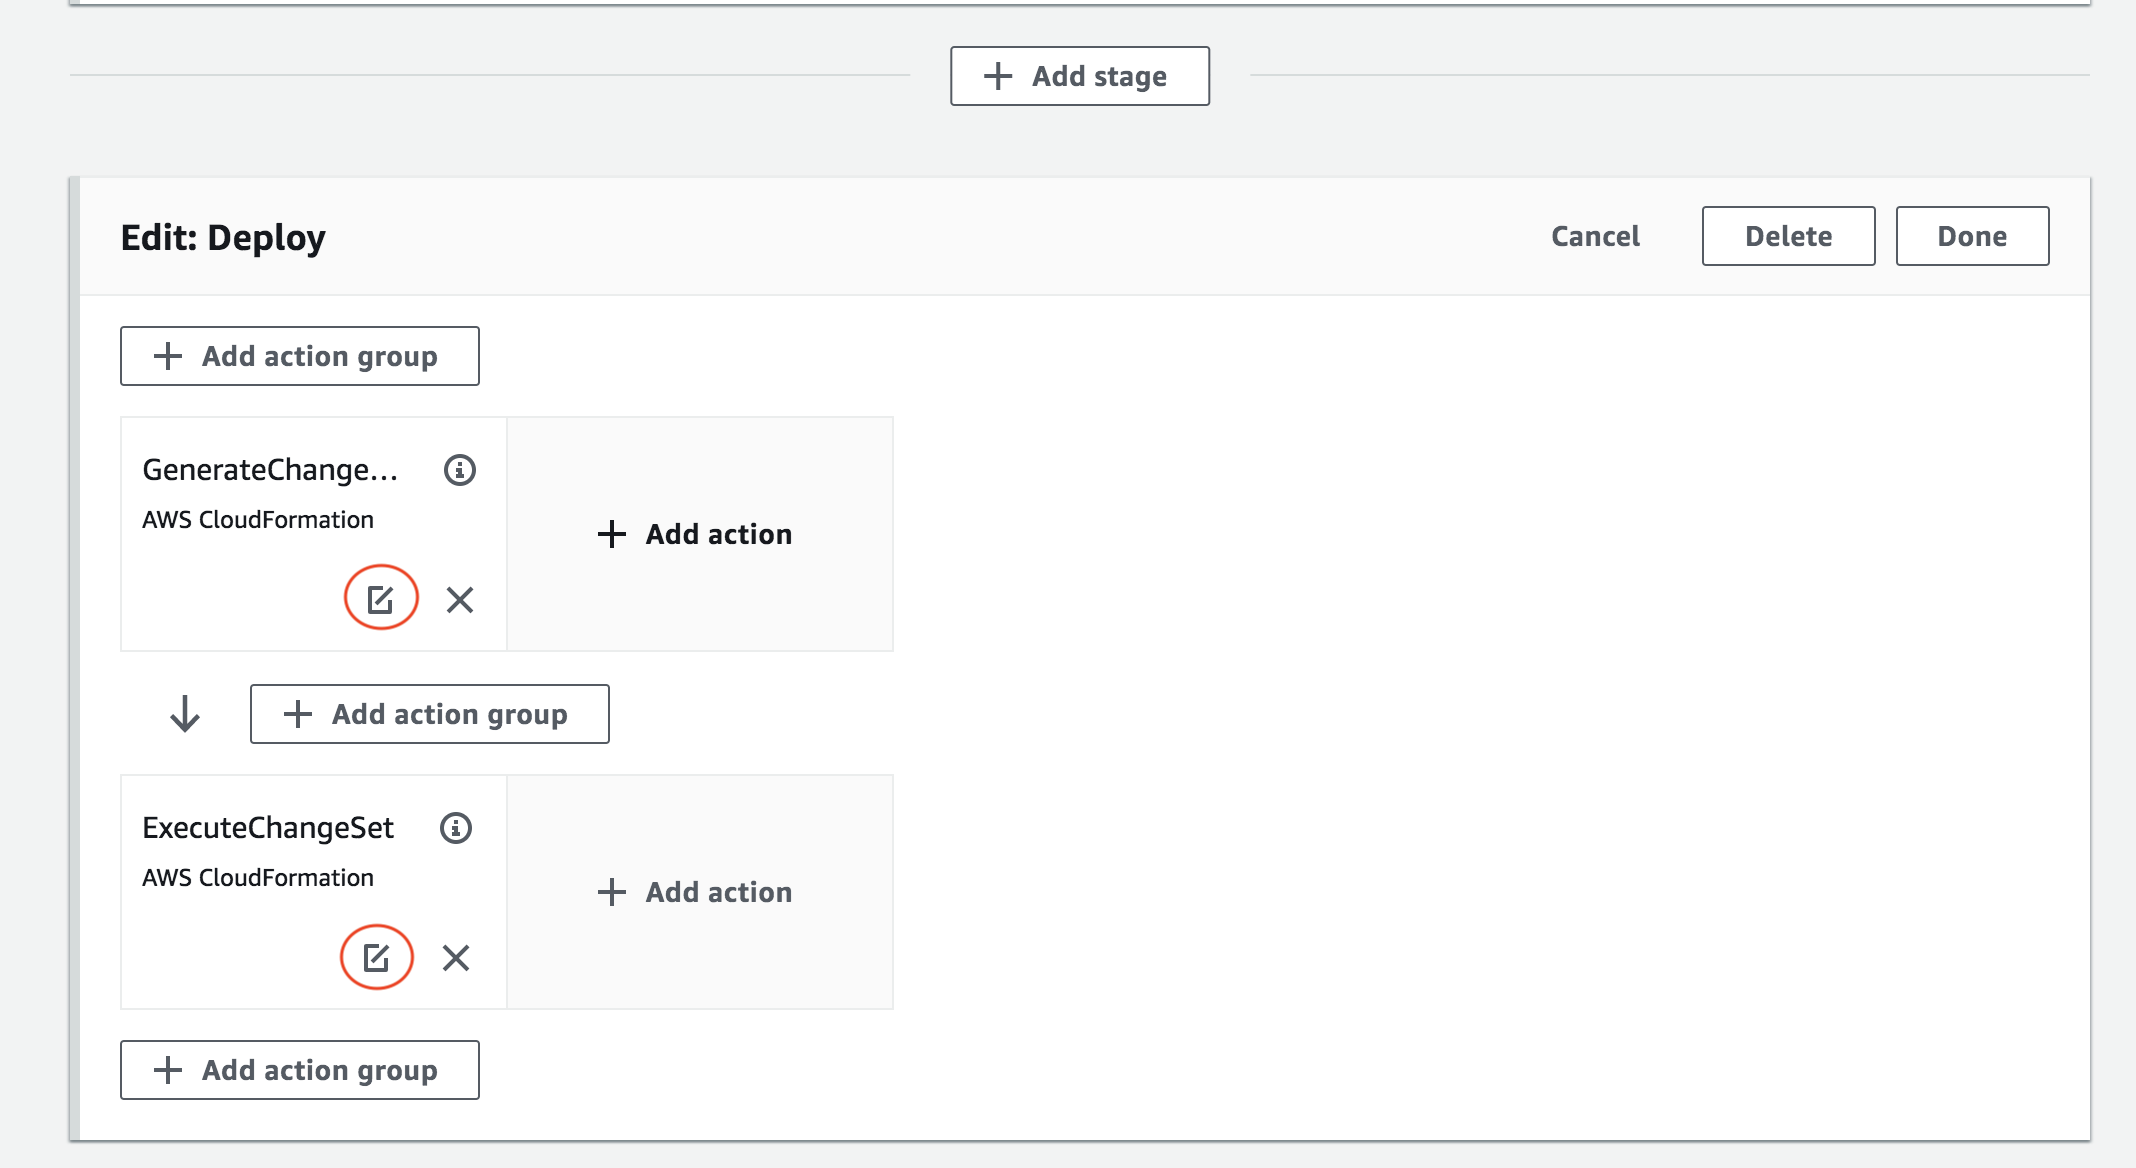
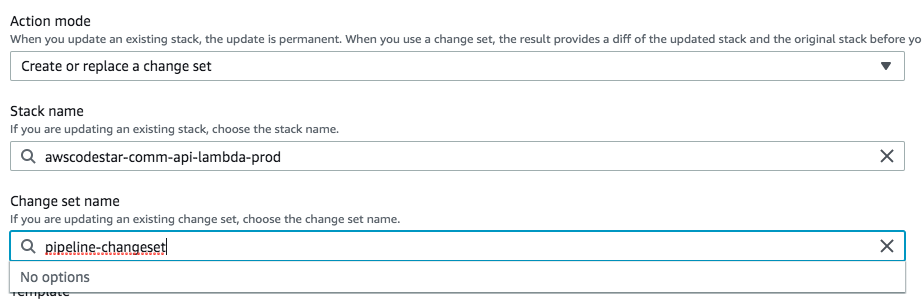
On GenerateChangeSet ‘Edit action’ menu, look for ‘Change set name’, it is somewhere in the middle of the menu.
Copy ‘Change set name’ value as you will need to paste it back later. As of June 2019, its value is pipeline-changeset.
Look for ‘Stack name’ and change its value to create a new stack. I usually add the word prod to label it as prod stack. When you do that, ‘Change set name’ field is reset. Thus, paste the copied value in ‘Change set name’ field.
Scroll to advanced section and change "Stage": "Dev" key-value to "Stage": "Prod" parameter overrides input field.

After modifying GenerateChangeSet action, do the same as editing stack name step above for ExecuteChangeSet action.
On ExecuteChangeSet ‘Edit action’ menu, look for ‘Change set name’, it is somewhere in the middle of the menu.
Copy ‘Change set name’ value as you will need to paste it back later.
Look for ‘Stack name’ and change its value to create a new stack. Use the same stack name as GenerateChangeSet action. After that, paste the copied value in ‘Change set name’ field.
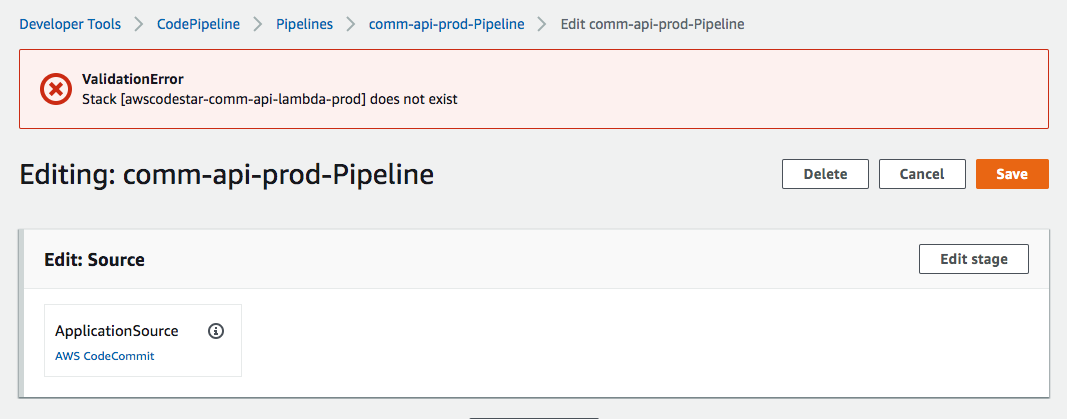
Click Done and Save buttons to save pipeline changes.
When you save, you may see stack does not exist error like this, it is ok. A new stack will be created.
6. Production Pipeline
Production pipeline has been created successfully. You can test it by clicking Release change button to build from prod branch.

CodePipeline Approval Stage
You can also add a manual approval stage to enable code review, prevent accidental commits and other reasons.
If you include a SNS(Simple Notifcation Service) topic ARN, users listed in that ARN will receive an email notification when approval is needed.

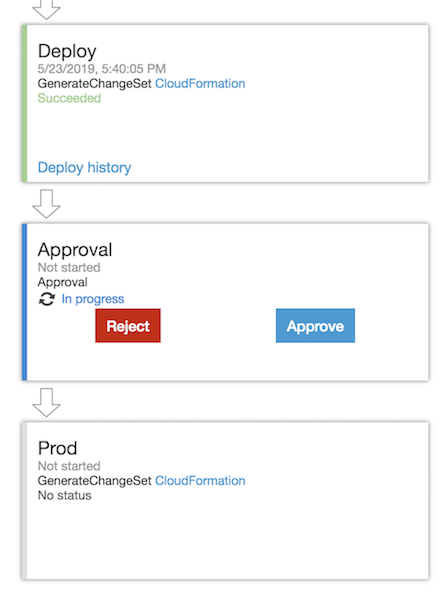
After adding an approval stage, it will appear like this on CodePipeline console when approval is needed.
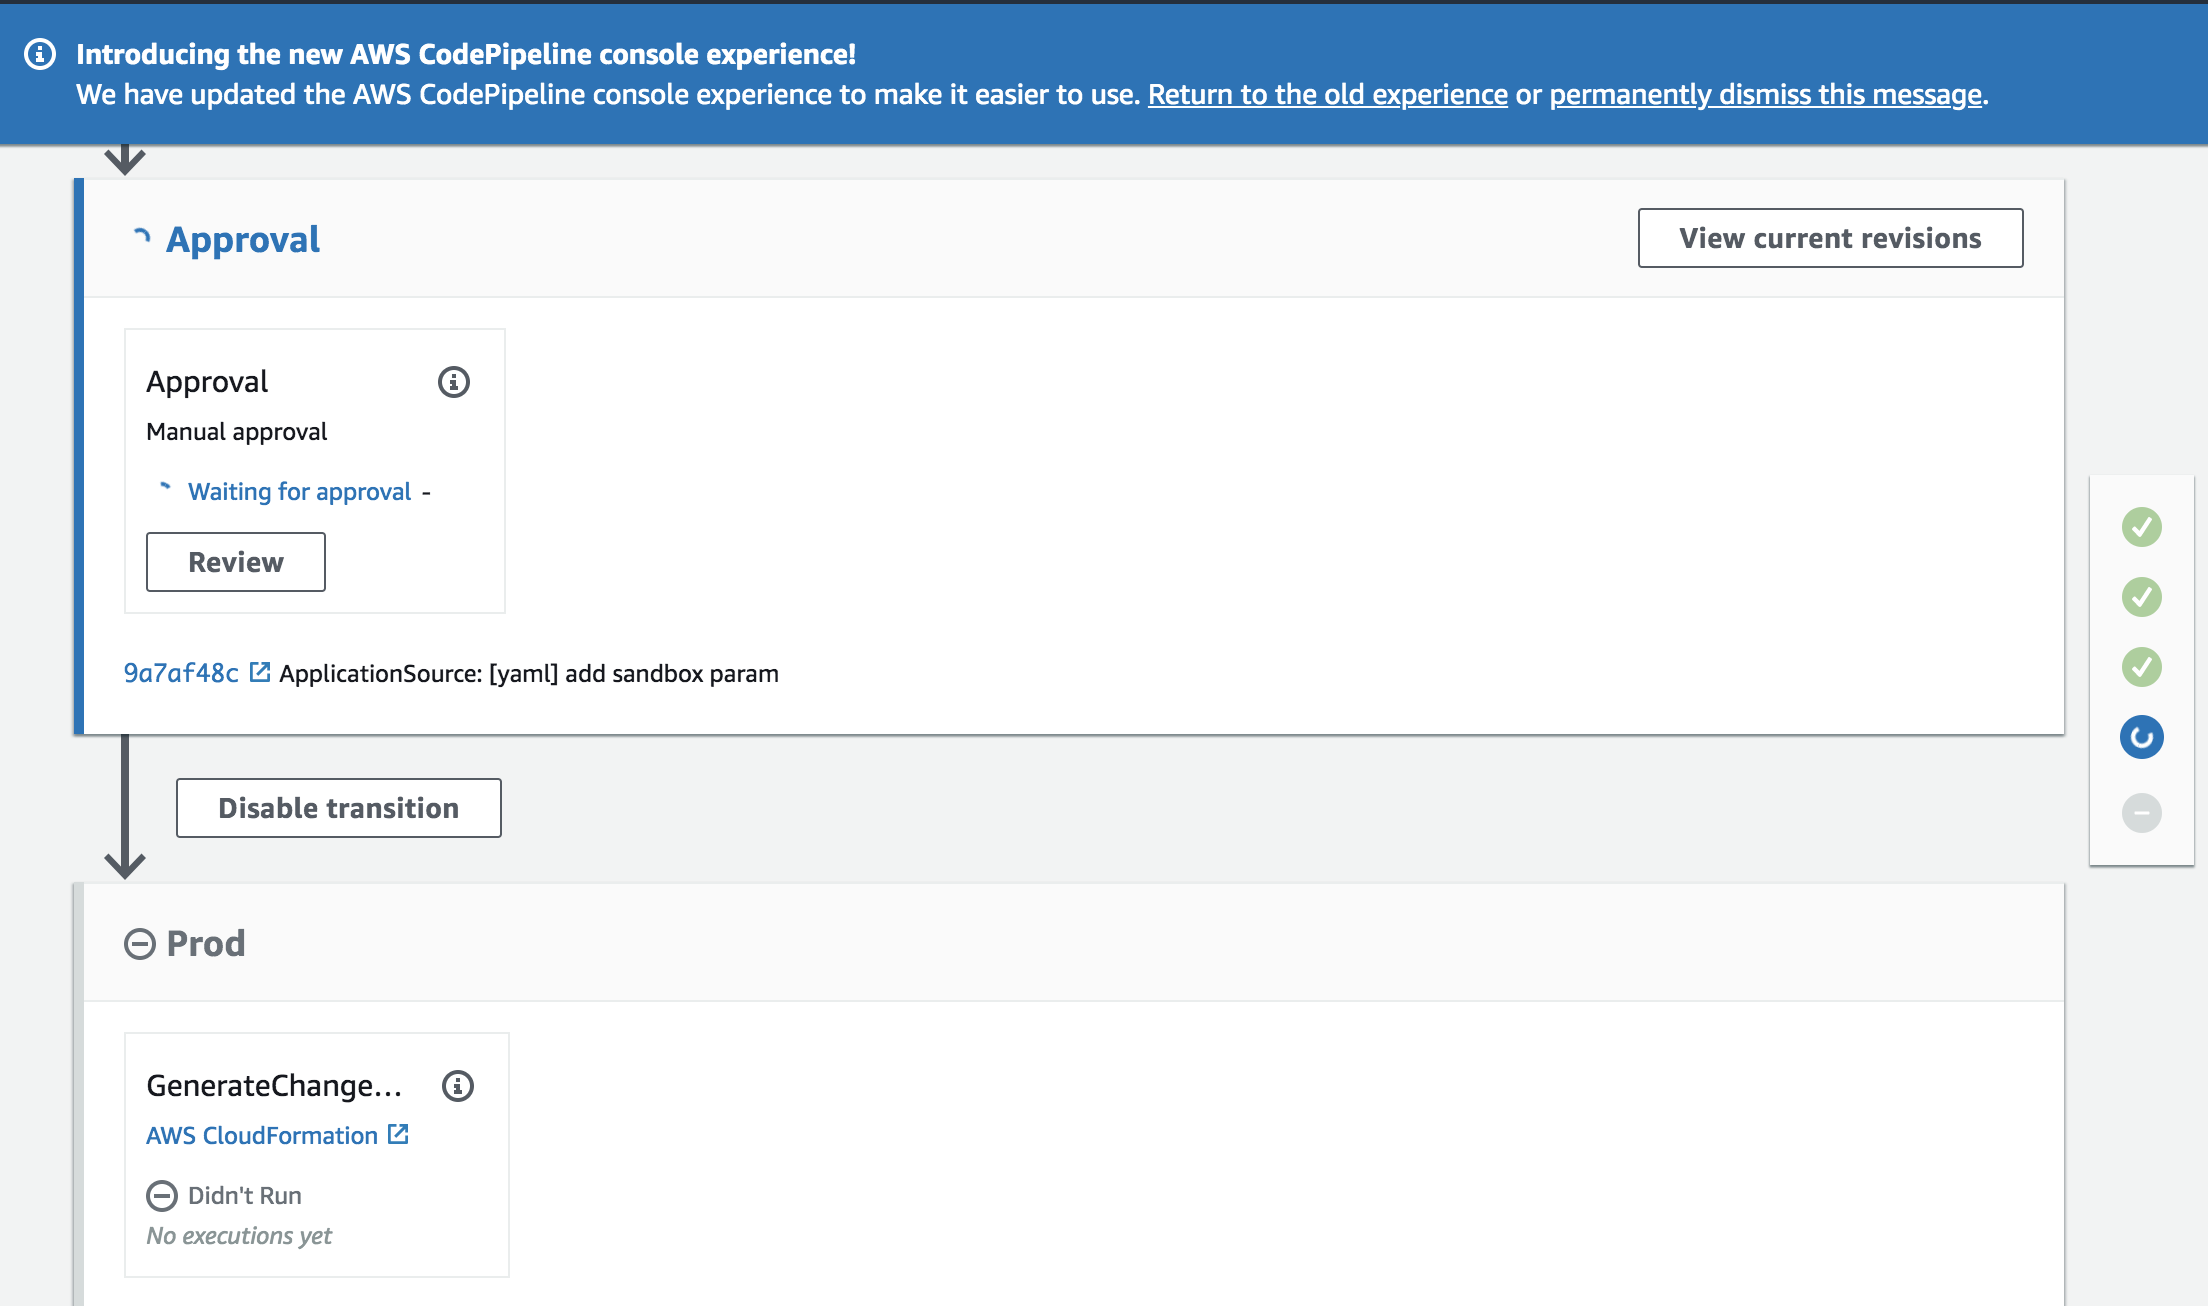
On CodeStar console, it will look like this.
Conclusion
Note that git push on master branch will deploy to development API and git push on prod branch will deploy to production API. To prevent accidental commits on production branch, I suggest adding an approval stage.
With this setup, you can develop new features, execute hot-fix and at the same time keep your production API unaffected.
Caveats
- There is a maximum number of 300 pipelines allowed per AWS Region in an AWS account. It is a soft limit which be increased if needed.
- All resources will be duplicated based by stage. This means you can’t have a resource that is declared using a constant name as CodePipeline will try to create the same resource in both pipelines. For example, this DDB table declaration will cause build error.
DdbTable:
  Type: AWS::DynamoDB::Table
  Properties:
    AttributeDefinitions:
      -
        AttributeName: "key"
        AttributeType: "S"
    KeySchema:
      -
        AttributeName: "key"
        KeyType: "HASH"
    BillingMode: "PAY_PER_REQUEST"
    TableName: ddb-table
- If you don’t mind creating two tables, one for development stage and one for production stage. You can append stage value to their names like this:
TableName: !Sub 'ddb-${Stage}-table'. - Note that changing DDB name in yaml will cause DDB table to be rebuilt and thus all data will be lost. Be careful if you are adding a production pipeline to an in production yaml.
- If there is any build error, it is probably caused by IAM permission issue. Check status reasons and error messages on CodeBuild and CloudFormation console. You may need to add permission for your project CloudFormation role.
You can check out Add IAM:CreateRole to CloudFormation Role article to see how to add permission for your roles.
Support Jun
Thank you for reading! ![]() Support Jun
Support Jun
If you are preparing for Software Engineer interviews, I suggest Elements of Programming Interviews in Java for algorithm practice. Good luck!
You can also support me by following me on Medium or Twitter.
Feel free to contact me if you have any questions.

Comments